Production
PRODUCTION

SETUP
CAMERA 1
On my first practice with the go pros I decided to try them at many different angles. This is so I can justify that I have chosen the perfect angle for my filming and the quality will be the best it could be.
The first location was just behind the steering wheel. This would have ben a good angle to get all of the front of my face (as the driver) and to capture my facial expressions in the best way possible. However, with the steering wheel moving, my wrists would have taken up a lot of the screen and my hands would have blocked my face at times - making this a very un-practical position for the GoPro.
The first location was just behind the steering wheel. This would have ben a good angle to get all of the front of my face (as the driver) and to capture my facial expressions in the best way possible. However, with the steering wheel moving, my wrists would have taken up a lot of the screen and my hands would have blocked my face at times - making this a very un-practical position for the GoPro.

This was another angle I tried the GoPro from. However, from the get go it wasn't a good move as the suction pad would not stick to the base of the accessory tray therefore it was wobbly and the footage would have been blurry. It also would not have been a good angle of the passenger as it was facing more towards the driver. As the main camera for this I need a perfect wide shot that captures both of our faces.

Yet another failed place for the GoPro. Although this was the perfect angle for the driver as nothing was blocking the shot / could block it, the suction would not work as the surface wasn't flat. Consequently there was no way to keep the camera still which would have made the quality of the video poor and bumpy again.

The final location that I trailed out was the best! As the GoPro has such a wide lens it captured both the driver and the passenger - perfect for a main camera. Although it was difficult to see expressions as it was further away from the faces, it is the main camera so is meant to not focus one expression as much. The 2nd and 3rd cameras will do this as they will be closer and therefore more intimate. The suction worked well to and the video that I recorded as a tester was smooth - even when the car went over bumps in the road the GoPro stayed put.

Comedians in cars getting coffee (CICGC) was a series that I looked into for my research. I found that they used 3 main camera angles, the GoPro being in the middle was one of them. As you can see above the camera will be situated nearly directly in the middle of the windscreen in order to get this angle. I think that they have also cropped the angle in post production to make it look much tighter and zoomed in, this makes it look less fish eye too. Below is my first attempt at placing the camera in the centre of the windscreen and driving, the inspiration for this came from the CICGC episodes.

As you can see from a clip of this practice video, both parties can be seen clearly and the recording is smooth - with little bumps being shown, I feel that this is due to the GoPro being made for extreme sports and is used to bumps etc. However, the shot is just a tiny bit too wide for my liking and you can see the entirety of the car - even the top of the windscreen! Therefore when it comes to editing it I will re-scale the shot and make it more zoomed in. Unfortunately this will make the shot a lot more pixelated and less clear due to the quality of the camera but the angle will be better.
CAMERA 2

This camera angle (like the others) was also inspiration from Comedians in cars getting Coffee. Although it is a wider shot than the one shown below it is almost identical - exactly what I was going for. I wanted this camera angle's main focus to be the driver and their facial expressions but to also capture the passengers side profile. If I could have had 3 cameras and had the main angle which is the middle one, I would have cropped this frame down slightly so it wasn't so wide and the focus would have been much closer to the driver. However due to not having the 3rd camera I felt it was important to leave the angle as it was as the wider the angle the more it captures.

This was an angle that I was always going to use as I think its important to have a close up of the driver when they are asking questions or speaking. I would say that my only problem with this angle is that you can see the windscreen slightly at the top as it is a very wide angle - to avoid this I should have tilted the camera down slightly. However, it is still a good angle as captures all of the drivers expressions without being too zoomed in and cutting out the passenger.
INSERT PICTURE OF CAMERA ON WINDSCREEN
CAMERA 3

This is the camera angle that focuses on the passenger the most, and just like the previous one you can still see the side profile of the driver. I prefer this angle to the one that focuses on the driver as its a much tighter angle but without cutting out anything important. You can't see the windscreen either which is a positive as it can be distracting and take the attention away from the focus.

INSERT PICTURE OF CAMERA ON WINDSCREEN
As you can see from this picture above of my set-up of the camera in my car I managed to mirror nearly their exact set-up. This angle captured a brilliant angle of the passenger, you can really see all of the expressions in her face but can also see the driver in the corner - which is important as there is not a 'main' angle that I can switch to due to me not being able to get hold of another suction pad.
SOUND
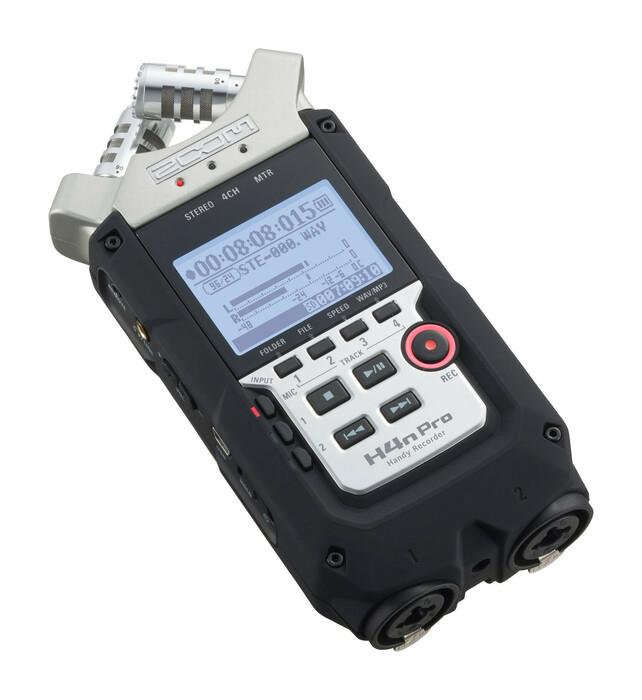
For my sound I decided the best thins to use would be a zoom mic and a tie mic for each person in the car. This way I managed to avoid the rattling of the car and really get the voices of both of the subjects clear without it being muffled. In all of my practice runs this audio turned out perfectly and really made a difference as compared to the GoPro audio it was phenomenal! However, unfortunately on the real run with Karla the audio failed as there was trouble with the connection between her tie mic and the zoom mic. This was completely out of my control as I was told later on that it could be due to the microphones being old and over-used. This was a major problem for me as I had worked so hard perfecting the audio. Consequently I had to use the GoPro audio in the end as there was no way of salvaging the other bits, this wasn't the end of the world though as at least I still have my video. From this I have learnt to always keep checking the sound waves on the zoom mic and possibly have a third shotgun mic recording at the same time incase anything happens like that again.

PRACTICE RUNS
Practice Run 1
This clip is my first ever run with a GoPro in my car on my windscreen. As this was my first trial I decided against using the mic's at the same time as I wanted to take it slowly and perfect the angle / use of the GoPro before I added another element to it. This also helped me to decide that the mics we're a must in the real run as the GoPro audio was not good and you can hear the sound of the car rather than my voice. I chose to use this particular angle first as its a popular angle with 'in car' shows such as Carpool Karaoke and Comedians getting coffee. It is a perfect 'middle' angle and captures both of the passengers. However due to the GoPro getting such a wide angle because of its lens, the top of the windscreen can be seen which makes the angle less about the expressions on the faces of the people and more about the car as a whole. If I was to re-do this angle I would have placed it further down on the windscreen and tilted it down slightly - making our faces the main point in it. Or, as another option I could have edited the angle in post production. By zooming in on the scale in Premier Pro it would have cut out the top and bottom couple of centimetres in the shot, the only problem with this is the resolution would have been much poorer and it would have looked very pixelated.
Practice Run 2
This is my second practice run and this time I trialled out 2 GoPros and Sound. For sound I went with a zoom mic and a tie mic, although its not the best form of audio as you can hear the car, you can also hear me which is one better than my first practice run. In order to improve the audio next time I'm going to try and make sure the tie mic is facing slightly upwards instead of downwards and is as close to my mouth as possible.
As for the angles in this - for a first run through with both cameras I'm quite chuffed with it. The GoPro that is focusing mainly on me (the driver) is slightly too high - I would like to try and not get the windscreen in it and you can see it in the top right corner. This is easily resolvable though as I just need to tilt it down a smidge and it will be a good angle for capturing my expressions etc. The second angle (focussing on the passenger) is also an angle that I am happy with, even though no one is in the passenger seat so you can't get a real feel for it I feel as if it will capture them perfectly as the focus is on the seat. You can also only see me in the left side which is good as the audience will be more likely to watch who takes up most of the screen which will be the passenger. However I do feel as if it is missing a middle, overall angle like I had in my first practice run. A angle that covers both of us perfectly is what will bring it all together and make it seem more seamless. The only problem with this is that there is no suction pad for the 3rd GoPro meaning that it can't be sick on the windscreen. I have tried lots of different methods such as sellotaping it down to the dashboard etc but the quality does come out as well as the others.
Practice Run 3
This practice run was the first one where I trailed out both audio and video with someone in the passenger seat. This run was 100% needed in order to perfect my setup and get to grips with editing it all together too. It was important to have a run through with a guest in the passenger seat my my camera angles, they needed to en capture the full face and upper body of the passenger without being too wide that the windscreen makes an appearance. I also wanted to be able to see me in the corner as it wasn't possible to have a 3rd GoPro to get the wide angle from the first test run through. This was a problem for me as I originally planned to have 3 angles for my multi-camera shoot but there were no solutions to this other than capturing both people in the angles that originally would have just been one person. Although it was frustrating for me as it was a massive obstacle in the production, I managed to overcome it by adapting to it and still making sure I had a multi-camera shoot. The audio also came out very well in this run which made me confident for my real run with Karla as I had practised it a handful of times and they had all been successful.
CHALLENGES
Throughout this project I have stumbled across many challenges but the majority of them I have managed to overcome. Although I have previously worked with a GoPro, I had never come across the newest version of it. This was something I had to teach myself, I had to learn how to work it and also how to attach it to the suction pad. This was a big challenge for me to start off with as you can't see the angle / footage until you upload it to Premier Pro, as a perfectionist this really stressed me out as I had to perfect the camera angle and just pray that it captured everyone/thing that it needed to. This is where my practice runs cam in handy. Without these I would not have known the perfect angle / position the camera needed to be at and therefore wouldn't have got the outcome that I did.
Unfortunately, the audio was a huge struggle for me when it came down to the editing. In spite of the fact that in all of my practice runs the audio came out really well, in the real run (the one that counts the most) it wasn't so good. Whilst recording I saw no problems with the audio as both of the VU meters looked perfectly fine and it was all set up how I had previously done it. However, when it came down to editing it for some reason Karla's audio was in and out and crackly - meaning you could not hear her at all. My mic still worked but I couldn't use it in editing as my voice was 10x louder than Karla's as the mic was closest to me. This all meant that I (begrudgingly) had to resort to using the audio from the GoPro as that was the only way you would be able to hear Karla's voice. The audio from it is not as bad as what it could be as it's from both of the cameras making it louder and clearer than it would have been with just one, but it is still not great because the background noise of the car can over power our voices at times. Although it is not the best of outcomes it also is not the worst - I could have been left with no audio at all and had to re-film but luckily the GoPros were to the rescue!
SUCCESSES
Notwithstanding the fact that many things went terribly wrong in this project, you always have to take positives from everything. The actual filming with the GoPros came out rather well, I believe this is because I completed so many practice runs - without these I wouldn't have had a clue! From my research I gathered 3 angles that I wanted to mirror in my project and although I only managed 2 as I didn't have the equipment to do so, the 2 that I captured where very similar to comedians getting coffee. This I am very proud of as it is not easy getting a good angle with a GoPro because you cant see it until in post production.
Another success for me was my planning, this is a rarity for me as my planning has always been my weakness for previous projects. This is why I made it one of my top priorities for this project. The majority of my planning documents were completed at least a week ahead of the shoot and this really helped me when it came to being prepared and setting up. Without these I would have struggled massively to keep track of the dates/tomes I was doing my practice runs and the angles I was trailing out as well.
Another success for me was my planning, this is a rarity for me as my planning has always been my weakness for previous projects. This is why I made it one of my top priorities for this project. The majority of my planning documents were completed at least a week ahead of the shoot and this really helped me when it came to being prepared and setting up. Without these I would have struggled massively to keep track of the dates/tomes I was doing my practice runs and the angles I was trailing out as well.
TECHNICAL DEVELOPMENTS
Throughout this project I have learnt many new skills that I will be taking with me when it comes to the next project. A major one that I previously struggled with is audio, I would even go as far to say that it was one of my weakest points. At the beginning of this year I didn't even know how to turn on a Zoom mic let alone set one up myself. Over the course of this project I grew more and more confident setting it up and using it on my own, this was due to practising and asking lots of questions (something that I don't always do). I then incorporated 2 tie mics into the project as this was the way to get the clearest audio for me. This was also all new to me so although it took a lot of frustrating moments, I finally understood it and can now happily set them up. Although this may not seem like a huge technical development, for me it is as now in the future I will not shy away from things like audio and will instead help out or be open to learning more.

EDITING

This is what the premier pro desktop looks like when i'm editing my multi-camera sequence. The top left shows both angles from my GoPros, so when I decide I want to change the camera whilst editing I can see what's going on in both. In order to change to a different camera I used the keys 1 and 2, 1 being the angle closest to the left and 2 being the right hand side one.

As you can see, once I pressed the space key to pause where I was up to the cuts appear. This is helpful for me as if I decide that I don't like a cut that I originally made I can easily change it through the keys 1 and 2.

To the left of this picture is where all of my footage is placed. I put them in separate bins and label each bin with what camera they came from - when it comes to editing and getting footage this is a huge help as it saves me from sifting through a massive list of footage. Instead I can just search for the camera it was shot on and move it onto the timeline immediately, this has saved me so much time so I can do more important things rather than rating to find footage.

Unfortunately, the audio did not turn out how I wanted it to in my final film, this was due to reasons out of my hands. The bottom row with audio in it (A3) has been muted as this was the audio that did not work, the one that hasn't been muted which is underneath the footage is the audio from the GoPro. The blue part of footage is the end of the show but for some reason it only has one channel of audio and as you can see the wavelengths are much smaller. I attempted to turn it up but the only thing that got louder was the sound of the car and not our voices. Therefore this small segment of footage sounds completely different to the rest of the video, this is frustrating for me but even my peers and teachers could not figure out why.

This is my timeline once I had finished editing fully.
LIVE
This is my finished product for my LIVE project, although it is not perfect I have worked very hard on it and am proud of the outcome.
NOTES

Progress is developing well on this page. You must... explain your successes during the shoot e.g. technical developments you have learnt. Challenges... identify the problems that arose during your shoot and … how did you solve these? Show the connections from your research and planning ... your shoot, audio and graphics.
ReplyDeleteDefine your target audience and decide how you reached this viewer. Find a similar show and define that audience... demographic … THEN compare your research data... THEREFORE you developed a target audience of your own for your film.